Tuesday, May 26, 2015

the decision to be faithful

I’m torn between two very strong feelings: that God is calling me to shine a light on my grief (however ugly it is) and that it hurts too much to sit and dwell and reflect and re-hash.

A month or so ago I listened to a sermon by Andy Stanley, and he said something I can’t get out of my head. He said, "You have no idea what or who hangs in the balance of your decision to remain faithful when everything around you says "Be faithless." You have no idea what God might be up to through your faithfulness when everything around you says, 'There's no point...

Then, a few days ago, I listened to a sermon by my sister-in-law about God’s purpose for us and why we need to embrace the gifts He has given us. She talks about our place in the body of Christ — how we might think of our role as unimportant, but that truly the body is made stronger and better when we take our role seriously and use it to serve Christ and others. She said, "It’s the enemy’s greatest fear that you guys are walking in the plans that God has for your life.”

Do you think God might be trying to tell me something?

Part of the struggle with sharing my grief is that I don’t want to be that person who is allowed to suffer so that her suffering might be used for God’s glory. I don’t want losing two babies so I can witness to others to be God’s plan for my life. You might think that’s fair, or you might think I’m being terribly selfish or terribly un-Christian. But the thing is, now that it’s happened (my losses), I DO want to bring God glory through my suffering and how I choose to share about my grief. I just wish the losses had never happened in the first place. I wish there was some guarantee that my grief is over — that I won’t lose anything else. I thought John was it, and then I lost Jane. The fear doesn’t come from what’s already happened as much as from wondering if this is my lot. I wonder what else I will be asked to give, or how long I will be asked to wait.

I wonder what hangs in the balance of my decision to be faithful.

I wonder what being faithful is supposed to look like for me. Does it look like telling the story of my hurting, slowly healing heart, even though I desperately wish I didn’t have this story to tell? Does it look like listing out my sufferings like Paul, so I can point to the list and say, Hey, all these terrible things happened to me. Did you hear me the first time? I’ll tell you again. I suffered. I suffered. I suffered. One thing has never changed: God is present, God is good and God is working in my life.

I had a great Saturday. I started the day off with a run (!!!), attended a “packing party” where I ate delicious scones and coffee and boxed a million DVDs while chatting with a friend, snuggled my pup and read a good book on the deck. I took a fabulous shower and was excited about our plans to go out that evening with a group of friends. I started to dry my hair, and then, out of the blue, I started sobbing. Loud, gasping sobs. I grabbed a pillow and screamed into it, laying sideways across the bed and thinking, whaaaat the heck?

It’s simply always there. The cost of being sad all the time is that it’s miserable to be sad all the time. The cost of setting grief aside for a bit is that it eventually bubbles out of you and you do yourself a disservice by not letting yourself feel.

I miss them.

I gave myself five minutes to cry. Then, I pulled it together, put on my makeup and went to dinner. I had a wonderful time. I can look back on that day and think, the old Laura is coming back. I can see the “new” Laura is present in the story, too... the Laura who cries out of the blue sometimes, who misses her babies and often feels very alone. The Laura who would really like for God to send a baby to her doorstep, preferably with a note that says, John and Jane are waiting for you. Here is a little one to hold. You get to keep this one.

The Laura who never thought the decision to be faithful would look like this.

design by Mary Hairston
get the free printable HERE


Friday, May 22, 2015

Laurel’s guest room makeover

Earlier this week I headed to Bel Air, Maryland, to visit my closest friend. Laurel and I have known each other since middle school, and she is one of my greatest cheerleaders. Most recently, she has encouraged me to pursue my dream of having a side business as an interior decorator. She invited me to visit her new home and do a makeover of her guest room. How sweet is she? 

Laurel described her guest room as a bland-looking space with a hodgepodge of various pieces of furniture. I was given a budget of $225 (though she preferred I stay closer to $200) and full freedom to decorate how I liked. She already knew she wanted to reupholster the chair and asked for my help with picking a fabric. She told me she wanted the room to feel welcoming and cozy, with a place for guests to set down their bags. She also hoped to see a pop of color somewhere in the space.

Please excuse my not-so-great phone pictures. I can’t believe I forgot my DSLR! :(
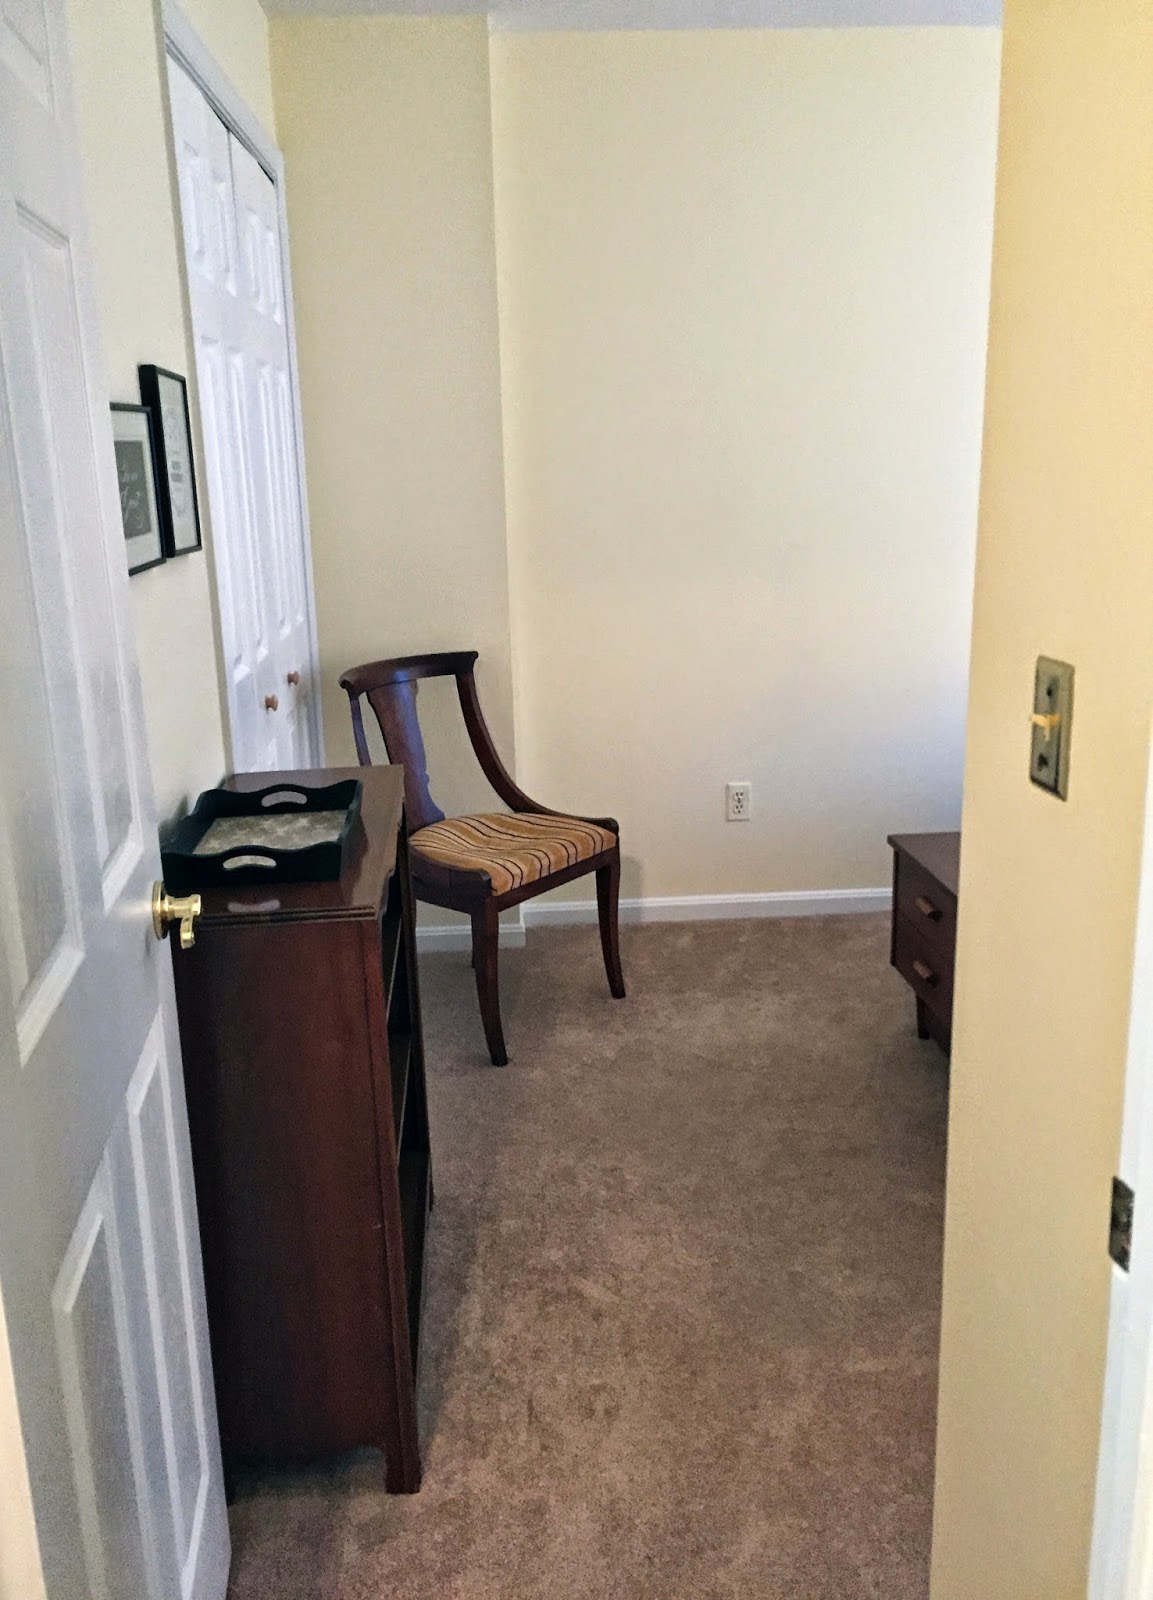
Here’s what the room looked like before:


And here’s what it looked like a day later:


What a difference!

In case you can’t tell from the pictures, there is just over a foot of space on either side of the bed, and several feet of space between the end of the bed and the closet. My very first suggestion was to remove the trunk at the end of the bed. The trunk is truly great, but it was too deep for the space. While I love mixing up styles, it was too different in style from the bed. Laurel agreed that it wasn’t the best fit, but she really wanted a surface for guests to set down their things. I walked around her house to try to find a different piece of furniture. Thankfully, she had a bench that was the perfect length and depth for the foot of the bed! We swapped the trunk for the bench right away and the room already looked better. 

The pale yellow wall color is very fresh in person and I had a hunch we could make it work. Laurel can always paint in the future. The bookshelf looked a bit plain in the pictures Laurel sent me, but once I saw it in person I could see it’s a beautifully made antique piece, and the wood is too pretty to paint!

I suggested we try the following: a colorful patterned bedspread with white curtains, or colorful curtains with the existing white bedspread and a few fun accent pillows. I was originally leaning towards colorful curtains, but Laurel said she’d ideally move the white bedspread to her own bed. Our direction was decided upon pretty quickly when Laurel fell in love with a blue quilt on our first shopping trip to Target. (Funnily enough, I have the same quilt in yellow.) We found curtains we loved, but they weren’t in stock. We left Target having spent just over half of the budget (quilt, shams, accent pillow and faux plant.) I still wanted to pick up curtains, a nightstand, a lampshade and a piece of framed art, but we didn’t have a ton of money left over. I also didn’t love the accent pillow we had picked up from Target. We went to Home Goods next and I immediately spotted the PERFECT pillow. I also found a great little accent table at Home Goods. It was the right size, shape and color for the space, and it was only $40! (Accent tables at Target were $60+.) We picked up a couple baskets to try on her bookshelf and eyed the framed art section. No luck on art! We also tried Kohls for art, but again — no luck. 

We called it a day and went back to Laurel’s to have dinner. We played around with our new purchases and discovered we liked the look of the quilt without the shams. Not buying shams opened up more room in our budget, which made me very happy!

The next morning we went to a different Target and picked up the curtains we had wanted, a third storage bin for the bench, and a curtain rod and lampshade. We peeked at Ross for art, but didn’t find anything we loved. At that point getting art was last priority. We actually didn’t have room in the budget for art. We would have only picked something up to show what Laurel could do in the future. We went to Walmart for fabric and decided to see if they had better prices on a similar looking curtain rod and lampshade. They did! YAY! I also spotted an inexpensive owl vase that I thought would look great on Laurel’s bookshelf, since it’s very close in color to the blue quilt.

Back at the house, Laurel worked on installing the curtain rod while I styled the bookshelves. I used the new vase and basket along with books and and a sewing box Laurel already owned. I had brought along one of my mirrors to use in her room and offered to sell it to her at a fair price. I wish we could have hung the mirror lower, but then no one would be able to actually use it! (If you love the mirror, the T.J. Maxx in Frederick is selling that exact one for $20. Mine is from Target several years ago.)

Here are a few more pictures of the updated room:


The top print says, “Be our guest” and the second says, “Welcome, the wifi password is ...”
(The room looks blue because this photo was taken at night, when the only light was from the lamp.)

Remember, this is how it looked before: 


and now:

Those curtains! That lampshade! And that little faux plant! Eee! :)

Laurel already owned the two gray storage bins. We bought another, but accidentally grabbed the wrong size. We would have hit her max budget if we had bought the bin, though. We agreed it wasn’t necessary and she can always add one in the future.


Laurel wasn’t sure about this table when I picked it out, but she was willing to try it. I’m glad she fell in love with it, because I think it’s absolutely perfect.


The white fabric I picked for the chair has a gorgeous weave. I know white is risky for stains, but it looks awesome against the wood and Laurel can easily Scotchguard the fabric.


Notice how nice our purses look on top of the bookcase? Haha.


I adore that accent pillow. Laurel was outside of the store when I found it, and it was really fun to see the look on her face when she walked in and saw me holding it up. It was love at first sight. :)

The photos truly don’t do the room justice. It was a pleasant room to be in before, but it lacked personality. I loved how the original white bedspread brightened up the space, so I’m glad we went with white fabric for the chair and used all white pillows (as well as mostly white curtains). The gray lampshade is much fresher looking than the old one, and it adds subtle color and texture.

Laurel has a beautiful front board from an upright piano that she mentioned could be used in the room as art. I LOVE that idea! I suggest painting it white with milk paint and giving it a slightly distressed look. (Like this and this.) The color of the front board is too similar to the wall color in daylight. The little ledge could be used to lean pictures against, but I think the piece is gorgeous just the way it is.


How the budget was spent:

Target quilt - $60 (on sale)
Target curtains - $48 for 2 panels (on sale)
Home Goods accent table - $40
Walmart lampshade - $15
Walmart curtain rod - $12.50 (cheaper in store)
Walmart owl vase - $10
Target mirror - $10 (no longer sold in stores or online)
Home Goods Basket - $6
Target faux plant - $3 (from the dollar bin section!)
Walmart fabric (for chair) - $3
=$207.50

I happened to visit Laurel on her birthday. My gift to her was the white accent pillow from Home Goods. It was a good price for a large and well-made pillow. I wish I had bought one for myself!

Here’s what Laurel has to say about her room’s new look: I completely adore it! The transformation is amazing to me. It went from being very plain to inviting, fresh, and pulled-together in no time! My absolute favorite is the curtains she picked out and how she hung them. They really add interest to the room and help mask the fact that the window is off-centered. I was a little unsure of the wooden side table at first when she picked it out at Home Goods. I wasn't sure it would go well in the space, but once I saw it next to the bed, I fell in love. It's the perfect little table for that corner! Laura made the space exactly what I wanted. I can't wait to have my first guest come to stay! 

Which change or new addition do you like best? I love it all (duh), but I think the biggest wow comes from swapping out the curtain rod and curtain.

Laurel, thank you for encouraging my dream and for trusting me with your guest room!

Sunday, May 17, 2015

styling shelves: how to

This is the post several of you have asked for! Today I’m sharing five tips to get you started on styling your shelves.

1. Look for inspiration and determine your vision
Pinterest is an obvious (and great) source of inspiration. I also like to look at store catalogs, design books, interior designer blogs and magazines/online mags, such as Elle Decor, Lonny and Better Homes and Gardens. I knew very little about decorating when I got married and our first big furniture purchase (Sloane leaning shelves and desk from Crate & Barrel) overwhelmed me. I looked at the C&B catalog to see how they styled the shelves, and that’s where I stole got the idea of hanging art over the desk space.


Oh, and I totally copied someone else’s gorgeous shelves when drawing up plans for our den shelves. There’s no shame in my game!

Check out a variety of bookshelf styling ideas all in one post here.

When it comes to creating a vision, think about what you want the shelves to be used for and what you’re hoping they’ll look like. Do you want them to look airy and bright? Crowded and colorful? Do you want to display mostly decorative accents, storage solutions, books or a mix of all three? My top priorities when setting up the den shelves were displaying lots of books and my various brass decor items.


2. Gather items (keeping dimensions in mind) and start with the big stuff
It’s time to get all of your stuff together in one spot! Try going around your house and “shopping” the various rooms for items you could put on your shelves. Don’t forget to only grab items that work with the dimensions of your shelves.

Getting started can be the most overwhelming part. I recommend putting big items up first (including large storage pieces). Play around with left, right and center alignment. For my den shelves, I first put up the antelope bookends, armillary sphere, large framed picture and magnifying glass stand.

3. Add in books and smaller items
Next, add your books. There are lots of options here — stack them horizontally and vertically, lean them against something, group them by color... I recommend trying a little bit of everything! Then add in all of your smaller decorative objects. Try grouping like items together, such as a trio of bud vases or a pair of framed pictures. Make sure to put your most unique accents around eye level or slightly above.

4. Evaluate scale and finish/texture
Scale refers to the height of an object in relation to another object (or person). See the four items in the very middle of my den shelves? They all vary in height, but I have two relatively large items and two relatively small. My sketches for Jessica’s built-ins show more examples of how to use scale in design.

Aim for a variety of finishes and textures throughout your shelves. On my leaning shelves I have a leather magazine bin, a textured box, a vintage fan, white textured birds, a pitcher, a plant, a metal oversized initial, a wooden bird, silver frame and porcelain bowls. It all works because it draws from a mostly neutral color palette.

You’ll notice from looking at inspiration photos that some people totally stuff their shelves and others have a lot of white space. I personally think SOME white space is necessary, because it gives your eyes a break.

styling by Emily Henderson - photo by Ryan Liebe
I like how the white walls, white brackets and white shelves help keep the unit pictured above from being overwhelming. Notice there is a mix of tall and short items, plus a mix of finishes. I want that lamp.

5. Edit one more time!
Once you’re done, take a picture — then switch the placement of a few of your pieces. Take another picture and see which one you like better. Now take something off of the shelves, and take another picture. Go through the pictures and imagine you’re looking at them in a magazine. Which picture appeals to you the most? Sometimes simply moving (or removing) one thing will make a big difference.

I have a trio of miniature wooden bowling pins that I really wanted to display on our den shelves. I kept moving them from shelf to shelf, seeing how they looked. They’re adorable, but for some reason they didn’t look great on the shelves. Seeing the way they looked in a picture versus in person helped me make the decision to nix them completely.

If you’re still stuck, who you gonna call?

(The answer is me. Not Ghostbusters.)

Wednesday, May 6, 2015

styling shelves: Jessica’s built-ins

contest update -- Caitlin won! thank you for entering!

I’m excited to share with you the first post in a series I’ll be doing on styling shelves! To kick off the series, we’re going to peek into the home of my friend Jessica. Jessica lives in a ranch-style home in Suffolk, Virginia, and has a gorgeous wall of built-ins in her family room. She sweetly asked for my advice on how I’d decorate them, and out of her request a blog series was born!

Here are those swoon-worthy built-ins:


The cabinets are being used to store DVDs, games and toys, and it’s time the upper shelves got put to work, too! She wants to use the built-ins as a space to display family photos, books and decorative accents, and would love to see some nods to Scotland, where she and Matt spent their honeymoon. She describes her decorating style as “relaxed, warm, lived-in coastal cottage.” Her favorite colors are earth tones. 

As much as I love a great vase or kooky decor item, I wanted to make sure I was also bringing in some pieces that will have a practical purpose. Baskets and boxes can store small toys, crayons, handwritten notes, loose photos, stamps and envelopes... the list goes on. I also imagined that some of the shelves could display pretty dining pieces, like a serving platter, cutting board or set of glasses. Below I share some of my favorite finds -- but as much as I love them, I see them more as a jumping-off point. I’m all about finding a bargain or waiting for a sale, and I tend to space out my “big” purchases. It’s worth looking at the home section of Goodwill, Ross, TJ Maxx, Marshalls, Michaels, Hobby Lobby... even Craigslist!


clockwise from top left: Scoop Ball Set (hide the ball in a cabinet) - $39.95 / Infusions Decanter - $1.97 / Amuse Serve Board - $19.95 / Kiwi Bird - $29.95 / Mini Heirloom Watering Can - $18 / Nate Berkus Snail Placecard Holder set (just for decoration) - $7.99 / Asst. of Three Essential Book Boxes, Navy - $29 / Whale Bookends - $45 / Mae Bud Vases - $5.97-7.97 ($20.91 for the set) / Blackwash Rattan Bin - $25 / Chalkboard - $12.99 / 4 inch Terra Cotta Clay Pot - $0.78 each (plus $0.77 for saucer) / Terra Cotta Vases (set of 4) - $27.99 / Rope Lantern - $15 / Navy Bisgo Marten Paper Drawers - $26.99 / Gold Quatrefoil Hurricane - $19.96 (but I found it at Marshalls for $12.99!) / Yuzu and Sea Salt Mason Soy candle - $14.49 (or buy pillar candle for hurricane - p.s. I have this candle and it’s amazing) / Clarus House Box - $34.97 / Blair Tall Vase - $6.97 / Glasgow Heart Print - $18 / Leone Blue Pitcher - $6.97 / Wood houses - $6.97-11.97 ($28.91 for the set)

Other potential items, not pictured: metal sphere, artisan botanical object, and of course, Jessica will want to find frames she likes to display family picks. For grouped frames, I’d suggest thin black frames with a white mat. For single frames to display throughout the shelves, she could do something that would give more of a statement, like this. I also bought Jessica two bowls — one brass, and one amber glass. They’re perfect for placing on top of a stack of books. (Also, I’d pick one of the two sets of bud vases pictured above. I chose to work with the set of four when I drew out plans.)

My top picks: Everything! But if I had to choose only three things, I’d go with the whale bookends, gold snails and the set of wooden houses. That kiwi bird is rather fabulous, too.

Please excuse my smudge-y and terrible drawn ideas for how Jess could style her shelves. I’m no artist! Also, I apparently don’t know how to properly scan paper. This is my first time doing this, people. Let’s play the game “guess what decor item Laura was trying to draw.” Try not to look at my watering cans and whales too closely. :)

Option one:


Whoops, I forgot the snails! I’d put them on the far left, second shelf up, in front of the vase. I put the set of wooden houses on the shelf above the entry. The far right top shelf decor item is an imagined low basket with bowl fillers, like theseHere’s a DIY for those triangle bookends. The two rectangles on the middle far left shelf are the rattan baskets. This option doesn’t have the kiwi bird, and has a potted plant on the bottom middle shelf.

Option 2:

For this option, I have a set of decorative plates on display above the entry. I have the snails (terribly drawn, lol) in front of the set of three plants.

Phew! Are you still here? I had so much fun with this project, and I can’t wait to get started on my next one! Jessica, thank you so much for encouraging my love for decorating and for giving me the opportunity to play with your built-ins.

Fun news: I’m doing a giveaway for a free design consultation! We will discuss a room or area in your house that you’re struggling to decorate, and we can communicate through Skype, e-mail...however you want! I can offer you the same service I gave Jessica, or tailor my service to your needs.

To enter: leave a comment below or on Facebook and include the phrase “I want to win!” Contest ends Friday, May 8th at midnight.