Showing posts with label decorating. Show all posts

Friday, May 22, 2015

Laurel’s guest room makeover

Earlier this week I headed to Bel Air, Maryland, to visit my closest friend. Laurel and I have known each other since middle school, and she is one of my greatest cheerleaders. Most recently, she has encouraged me to pursue my dream of having a side business as an interior decorator. She invited me to visit her new home and do a makeover of her guest room. How sweet is she? 

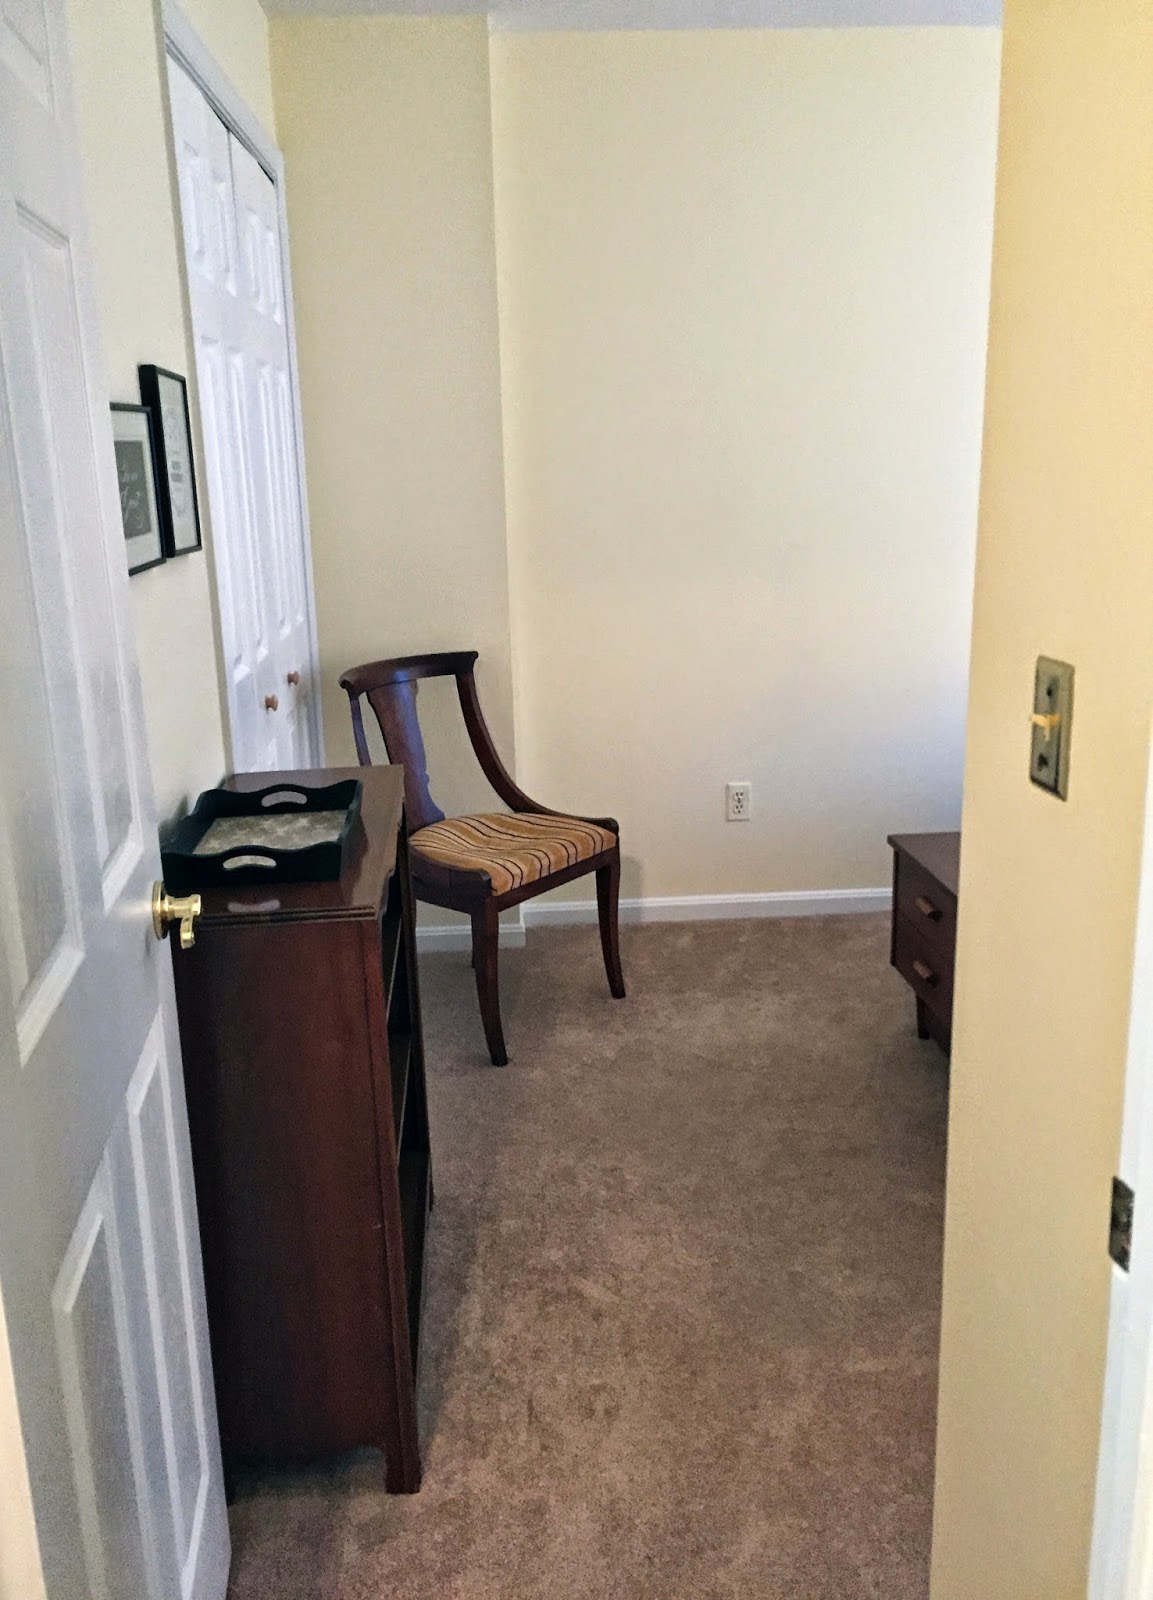
Laurel described her guest room as a bland-looking space with a hodgepodge of various pieces of furniture. I was given a budget of $225 (though she preferred I stay closer to $200) and full freedom to decorate how I liked. She already knew she wanted to reupholster the chair and asked for my help with picking a fabric. She told me she wanted the room to feel welcoming and cozy, with a place for guests to set down their bags. She also hoped to see a pop of color somewhere in the space.

Please excuse my not-so-great phone pictures. I can’t believe I forgot my DSLR! :(
Here’s what the room looked like before:


And here’s what it looked like a day later:


What a difference!

In case you can’t tell from the pictures, there is just over a foot of space on either side of the bed, and several feet of space between the end of the bed and the closet. My very first suggestion was to remove the trunk at the end of the bed. The trunk is truly great, but it was too deep for the space. While I love mixing up styles, it was too different in style from the bed. Laurel agreed that it wasn’t the best fit, but she really wanted a surface for guests to set down their things. I walked around her house to try to find a different piece of furniture. Thankfully, she had a bench that was the perfect length and depth for the foot of the bed! We swapped the trunk for the bench right away and the room already looked better. 

The pale yellow wall color is very fresh in person and I had a hunch we could make it work. Laurel can always paint in the future. The bookshelf looked a bit plain in the pictures Laurel sent me, but once I saw it in person I could see it’s a beautifully made antique piece, and the wood is too pretty to paint!

I suggested we try the following: a colorful patterned bedspread with white curtains, or colorful curtains with the existing white bedspread and a few fun accent pillows. I was originally leaning towards colorful curtains, but Laurel said she’d ideally move the white bedspread to her own bed. Our direction was decided upon pretty quickly when Laurel fell in love with a blue quilt on our first shopping trip to Target. (Funnily enough, I have the same quilt in yellow.) We found curtains we loved, but they weren’t in stock. We left Target having spent just over half of the budget (quilt, shams, accent pillow and faux plant.) I still wanted to pick up curtains, a nightstand, a lampshade and a piece of framed art, but we didn’t have a ton of money left over. I also didn’t love the accent pillow we had picked up from Target. We went to Home Goods next and I immediately spotted the PERFECT pillow. I also found a great little accent table at Home Goods. It was the right size, shape and color for the space, and it was only $40! (Accent tables at Target were $60+.) We picked up a couple baskets to try on her bookshelf and eyed the framed art section. No luck on art! We also tried Kohls for art, but again — no luck. 

We called it a day and went back to Laurel’s to have dinner. We played around with our new purchases and discovered we liked the look of the quilt without the shams. Not buying shams opened up more room in our budget, which made me very happy!

The next morning we went to a different Target and picked up the curtains we had wanted, a third storage bin for the bench, and a curtain rod and lampshade. We peeked at Ross for art, but didn’t find anything we loved. At that point getting art was last priority. We actually didn’t have room in the budget for art. We would have only picked something up to show what Laurel could do in the future. We went to Walmart for fabric and decided to see if they had better prices on a similar looking curtain rod and lampshade. They did! YAY! I also spotted an inexpensive owl vase that I thought would look great on Laurel’s bookshelf, since it’s very close in color to the blue quilt.

Back at the house, Laurel worked on installing the curtain rod while I styled the bookshelves. I used the new vase and basket along with books and and a sewing box Laurel already owned. I had brought along one of my mirrors to use in her room and offered to sell it to her at a fair price. I wish we could have hung the mirror lower, but then no one would be able to actually use it! (If you love the mirror, the T.J. Maxx in Frederick is selling that exact one for $20. Mine is from Target several years ago.)

Here are a few more pictures of the updated room:


The top print says, “Be our guest” and the second says, “Welcome, the wifi password is ...”
(The room looks blue because this photo was taken at night, when the only light was from the lamp.)

Remember, this is how it looked before: 


and now:

Those curtains! That lampshade! And that little faux plant! Eee! :)

Laurel already owned the two gray storage bins. We bought another, but accidentally grabbed the wrong size. We would have hit her max budget if we had bought the bin, though. We agreed it wasn’t necessary and she can always add one in the future.


Laurel wasn’t sure about this table when I picked it out, but she was willing to try it. I’m glad she fell in love with it, because I think it’s absolutely perfect.


The white fabric I picked for the chair has a gorgeous weave. I know white is risky for stains, but it looks awesome against the wood and Laurel can easily Scotchguard the fabric.


Notice how nice our purses look on top of the bookcase? Haha.


I adore that accent pillow. Laurel was outside of the store when I found it, and it was really fun to see the look on her face when she walked in and saw me holding it up. It was love at first sight. :)

The photos truly don’t do the room justice. It was a pleasant room to be in before, but it lacked personality. I loved how the original white bedspread brightened up the space, so I’m glad we went with white fabric for the chair and used all white pillows (as well as mostly white curtains). The gray lampshade is much fresher looking than the old one, and it adds subtle color and texture.

Laurel has a beautiful front board from an upright piano that she mentioned could be used in the room as art. I LOVE that idea! I suggest painting it white with milk paint and giving it a slightly distressed look. (Like this and this.) The color of the front board is too similar to the wall color in daylight. The little ledge could be used to lean pictures against, but I think the piece is gorgeous just the way it is.


How the budget was spent:

Target quilt - $60 (on sale)
Target curtains - $48 for 2 panels (on sale)
Home Goods accent table - $40
Walmart lampshade - $15
Walmart curtain rod - $12.50 (cheaper in store)
Walmart owl vase - $10
Target mirror - $10 (no longer sold in stores or online)
Home Goods Basket - $6
Target faux plant - $3 (from the dollar bin section!)
Walmart fabric (for chair) - $3
=$207.50

I happened to visit Laurel on her birthday. My gift to her was the white accent pillow from Home Goods. It was a good price for a large and well-made pillow. I wish I had bought one for myself!

Here’s what Laurel has to say about her room’s new look: I completely adore it! The transformation is amazing to me. It went from being very plain to inviting, fresh, and pulled-together in no time! My absolute favorite is the curtains she picked out and how she hung them. They really add interest to the room and help mask the fact that the window is off-centered. I was a little unsure of the wooden side table at first when she picked it out at Home Goods. I wasn't sure it would go well in the space, but once I saw it next to the bed, I fell in love. It's the perfect little table for that corner! Laura made the space exactly what I wanted. I can't wait to have my first guest come to stay! 

Which change or new addition do you like best? I love it all (duh), but I think the biggest wow comes from swapping out the curtain rod and curtain.

Laurel, thank you for encouraging my dream and for trusting me with your guest room!

Sunday, May 17, 2015

styling shelves: how to

This is the post several of you have asked for! Today I’m sharing five tips to get you started on styling your shelves.

1. Look for inspiration and determine your vision
Pinterest is an obvious (and great) source of inspiration. I also like to look at store catalogs, design books, interior designer blogs and magazines/online mags, such as Elle Decor, Lonny and Better Homes and Gardens. I knew very little about decorating when I got married and our first big furniture purchase (Sloane leaning shelves and desk from Crate & Barrel) overwhelmed me. I looked at the C&B catalog to see how they styled the shelves, and that’s where I stole got the idea of hanging art over the desk space.


Oh, and I totally copied someone else’s gorgeous shelves when drawing up plans for our den shelves. There’s no shame in my game!

Check out a variety of bookshelf styling ideas all in one post here.

When it comes to creating a vision, think about what you want the shelves to be used for and what you’re hoping they’ll look like. Do you want them to look airy and bright? Crowded and colorful? Do you want to display mostly decorative accents, storage solutions, books or a mix of all three? My top priorities when setting up the den shelves were displaying lots of books and my various brass decor items.


2. Gather items (keeping dimensions in mind) and start with the big stuff
It’s time to get all of your stuff together in one spot! Try going around your house and “shopping” the various rooms for items you could put on your shelves. Don’t forget to only grab items that work with the dimensions of your shelves.

Getting started can be the most overwhelming part. I recommend putting big items up first (including large storage pieces). Play around with left, right and center alignment. For my den shelves, I first put up the antelope bookends, armillary sphere, large framed picture and magnifying glass stand.

3. Add in books and smaller items
Next, add your books. There are lots of options here — stack them horizontally and vertically, lean them against something, group them by color... I recommend trying a little bit of everything! Then add in all of your smaller decorative objects. Try grouping like items together, such as a trio of bud vases or a pair of framed pictures. Make sure to put your most unique accents around eye level or slightly above.

4. Evaluate scale and finish/texture
Scale refers to the height of an object in relation to another object (or person). See the four items in the very middle of my den shelves? They all vary in height, but I have two relatively large items and two relatively small. My sketches for Jessica’s built-ins show more examples of how to use scale in design.

Aim for a variety of finishes and textures throughout your shelves. On my leaning shelves I have a leather magazine bin, a textured box, a vintage fan, white textured birds, a pitcher, a plant, a metal oversized initial, a wooden bird, silver frame and porcelain bowls. It all works because it draws from a mostly neutral color palette.

You’ll notice from looking at inspiration photos that some people totally stuff their shelves and others have a lot of white space. I personally think SOME white space is necessary, because it gives your eyes a break.

styling by Emily Henderson - photo by Ryan Liebe
I like how the white walls, white brackets and white shelves help keep the unit pictured above from being overwhelming. Notice there is a mix of tall and short items, plus a mix of finishes. I want that lamp.

5. Edit one more time!
Once you’re done, take a picture — then switch the placement of a few of your pieces. Take another picture and see which one you like better. Now take something off of the shelves, and take another picture. Go through the pictures and imagine you’re looking at them in a magazine. Which picture appeals to you the most? Sometimes simply moving (or removing) one thing will make a big difference.

I have a trio of miniature wooden bowling pins that I really wanted to display on our den shelves. I kept moving them from shelf to shelf, seeing how they looked. They’re adorable, but for some reason they didn’t look great on the shelves. Seeing the way they looked in a picture versus in person helped me make the decision to nix them completely.

If you’re still stuck, who you gonna call?

(The answer is me. Not Ghostbusters.)

Wednesday, May 6, 2015

styling shelves: Jessica’s built-ins

contest update -- Caitlin won! thank you for entering!

I’m excited to share with you the first post in a series I’ll be doing on styling shelves! To kick off the series, we’re going to peek into the home of my friend Jessica. Jessica lives in a ranch-style home in Suffolk, Virginia, and has a gorgeous wall of built-ins in her family room. She sweetly asked for my advice on how I’d decorate them, and out of her request a blog series was born!

Here are those swoon-worthy built-ins:


The cabinets are being used to store DVDs, games and toys, and it’s time the upper shelves got put to work, too! She wants to use the built-ins as a space to display family photos, books and decorative accents, and would love to see some nods to Scotland, where she and Matt spent their honeymoon. She describes her decorating style as “relaxed, warm, lived-in coastal cottage.” Her favorite colors are earth tones. 

As much as I love a great vase or kooky decor item, I wanted to make sure I was also bringing in some pieces that will have a practical purpose. Baskets and boxes can store small toys, crayons, handwritten notes, loose photos, stamps and envelopes... the list goes on. I also imagined that some of the shelves could display pretty dining pieces, like a serving platter, cutting board or set of glasses. Below I share some of my favorite finds -- but as much as I love them, I see them more as a jumping-off point. I’m all about finding a bargain or waiting for a sale, and I tend to space out my “big” purchases. It’s worth looking at the home section of Goodwill, Ross, TJ Maxx, Marshalls, Michaels, Hobby Lobby... even Craigslist!


clockwise from top left: Scoop Ball Set (hide the ball in a cabinet) - $39.95 / Infusions Decanter - $1.97 / Amuse Serve Board - $19.95 / Kiwi Bird - $29.95 / Mini Heirloom Watering Can - $18 / Nate Berkus Snail Placecard Holder set (just for decoration) - $7.99 / Asst. of Three Essential Book Boxes, Navy - $29 / Whale Bookends - $45 / Mae Bud Vases - $5.97-7.97 ($20.91 for the set) / Blackwash Rattan Bin - $25 / Chalkboard - $12.99 / 4 inch Terra Cotta Clay Pot - $0.78 each (plus $0.77 for saucer) / Terra Cotta Vases (set of 4) - $27.99 / Rope Lantern - $15 / Navy Bisgo Marten Paper Drawers - $26.99 / Gold Quatrefoil Hurricane - $19.96 (but I found it at Marshalls for $12.99!) / Yuzu and Sea Salt Mason Soy candle - $14.49 (or buy pillar candle for hurricane - p.s. I have this candle and it’s amazing) / Clarus House Box - $34.97 / Blair Tall Vase - $6.97 / Glasgow Heart Print - $18 / Leone Blue Pitcher - $6.97 / Wood houses - $6.97-11.97 ($28.91 for the set)

Other potential items, not pictured: metal sphere, artisan botanical object, and of course, Jessica will want to find frames she likes to display family picks. For grouped frames, I’d suggest thin black frames with a white mat. For single frames to display throughout the shelves, she could do something that would give more of a statement, like this. I also bought Jessica two bowls — one brass, and one amber glass. They’re perfect for placing on top of a stack of books. (Also, I’d pick one of the two sets of bud vases pictured above. I chose to work with the set of four when I drew out plans.)

My top picks: Everything! But if I had to choose only three things, I’d go with the whale bookends, gold snails and the set of wooden houses. That kiwi bird is rather fabulous, too.

Please excuse my smudge-y and terrible drawn ideas for how Jess could style her shelves. I’m no artist! Also, I apparently don’t know how to properly scan paper. This is my first time doing this, people. Let’s play the game “guess what decor item Laura was trying to draw.” Try not to look at my watering cans and whales too closely. :)

Option one:


Whoops, I forgot the snails! I’d put them on the far left, second shelf up, in front of the vase. I put the set of wooden houses on the shelf above the entry. The far right top shelf decor item is an imagined low basket with bowl fillers, like theseHere’s a DIY for those triangle bookends. The two rectangles on the middle far left shelf are the rattan baskets. This option doesn’t have the kiwi bird, and has a potted plant on the bottom middle shelf.

Option 2:

For this option, I have a set of decorative plates on display above the entry. I have the snails (terribly drawn, lol) in front of the set of three plants.

Phew! Are you still here? I had so much fun with this project, and I can’t wait to get started on my next one! Jessica, thank you so much for encouraging my love for decorating and for giving me the opportunity to play with your built-ins.

Fun news: I’m doing a giveaway for a free design consultation! We will discuss a room or area in your house that you’re struggling to decorate, and we can communicate through Skype, e-mail...however you want! I can offer you the same service I gave Jessica, or tailor my service to your needs.

To enter: leave a comment below or on Facebook and include the phrase “I want to win!” Contest ends Friday, May 8th at midnight.

Saturday, March 21, 2015

den: the shelves are DONE!

Today I’ll share my favorite part of our updated den — our DIY shelving unit! Please excuse all of the crazy shadows in the pictures. See, I had beautiful naturally lit photographs, but when I went to post them I realized I didn’t have any art in two of the frames. Then a few episodes of Arrested Development and a big bowl of pork ragu happened, and all of a sudden it was dark out!

Worth it.

The biggest transformation in the room was going from this:


To this:


I had the best time putting up several of the books and decorative objects I’ve collected over the years. Really, the hardest part of the styling process was choosing to say "no” to a bunch of my favorite objects in order to keep the shelves from looking cluttered.

I don’t mind the way the top shelf looks with the left side being blank, but I’m going to try putting a vine-y plant up there. I spent TWO HOURS in Michaels the other day looking at artificial plants! My mom saved the day by offering to give me an offshoot of her Philodendron.


I was originally planning to use my agate bookends on this bottom shelf, but my colorful books distracted from the agate and they got sort of lost in all the color. I picked up 4” clamps for $8 each at Home Depot and voilà!


These hanging frames at World Market caught my eye and I knew they’d be perfect for this spot. The art is a page from a book of quotes that I tore out and cut in half. I originally bought a beautiful faux mother of pearl box for the shelves, but I ended up having the same problem with the box that I had had with the agate bookends. It was really hard for me to return it (I’m still having second thoughts), but the basket I replaced it with was much cheaper and is less distracting. 


I had a mini freak-out when I saw this brass stand magnifier at an antique mall in Georgia. It is one of my very favorite things. The large piece of art is my “big” souvenir from my Europe trip. It’s a pen and ink of Salzburg, Vienna, with gorgeous watercolor detail. It happened to fit perfectly in an empty frame and mat that my parents had given me on one of my many “Becker basement shopping sprees.” (The bell was also taken from their basement. Thanks, mom and dad!)

The picture in my prism frame is cut from a postcard I bought at the National Museum of Ireland in Dublin. 


For $6, you too can have a ridiculous looking eyeglass holder that will make you smile.


Believe it or not, I’ve been keeping my eye out for a trophy cup for nearly a year now. This cup, from one of my favorite shops, is the perfect size and it has a gorgeous patina. 

There you have it! I am loving these shelves. I didn’t enjoy spending time in the den for a long time because of how cluttered it was. Now it’s a lovely space that I look forward to cozying up in.

Come on over! :)


Sources:
Trunk – from my childhood
Shelving unit materials – Home Depot
C-clamp bookends – Home Depot
Trophy cup – The Cottage in Dayton, VA
Rhinoceros – Kohls
Vintage camera – thrifted
Armillery sphere – gifted (World Market)
Hanging frames – World Market 
Rectangular basket – Michaels 
Prism frame – Retro Metro (also available at Bed Bath & Beyond and CB2)
Brass bell – gifted 
Salzburg print – gallery in Salzburg, Austria
Mat and frame around Salzburg print – gifted
Magnifying glass holder – Canton Street Antique Market in Roswell, GA
Eyeglass holder – World Market 
Brass antelope bookends – from grandmother
Gold clock – awarded to Andy from Kellogg’s!
Vintage set of “works of” books – from grandmother

Friday, March 13, 2015

the den slump

IT ISN’T DONE, PEOPLE. (Long, boring story.) Most of my books are piled in laundry baskets and our basement guest room looks like... well, like this:

REAL LIFE HOUSES OF FREDERICK COUNTY
Updating the den has been a lot of fun for me, but it’s also been taking (wait, grab a pretend flashlight and point it under your chin, Sandlot style and say it with me now)... FOR-EV-ER. I started shopping for the room six months ago! Changes inside the room started two months ago. Yeah, I thought I’d be done by now.


One of my favorite design bloggers, Emily Henderson, recently posted an update on her family room, and her honesty about her lack of progress made me sigh with relief. Emily bought her home in the fall of 2013. She first wrote about her family room in early 2014. It’s a mess. Fast forward to November ’14, where she posted about some progress that had been made. Notice there’s no art on the walls (except for during the photo shoot) and the pieces of furniture are all “works for now” kinds of pieces. She just gave readers another update of the room, as of February 2015. (Though to be honest, with the way many bloggers plan and draft posts, the room could be completely done right now and we just don’t know it yet.)

Emily is a successful designer and stylist. She’s had her own show on HGTV, she’s been featured in countless magazines and she was (is?) the home style expert for Target. Between her knack for great design and her bigger-than-mine income, she could pull her dream family room together faster than a year and a half. But she hasn’t! And I love that! :)

So, no den reveal quite yet. In the meantime I’ve been re-decorating the ladder bookcases in our living room and trying to “shop” in other rooms of the house so I’ll have plenty of options when I eventually style the shelves in the den. So far I’ve pulled a few bookends from the living room, a lidded basket from my bathroom, picture frames from our “Craigslist room” and a bunch of postcards that I had forgotten were in the back of the guest room closet.

I was hoping to put art up today, but last night Andy asked if I’d be open to putting a TV in the den. Attached to the wall. This should not be a big deal, but I’m the kind of person who internally freaks out whenever a slight change is made to her plans. We shall see.

Even though the den isn’t done, I’m already much happier in the space. I have a new little spot to sit and read! Here’s a tiny sneak peak:


Monday, February 23, 2015

DIY shelving unit for the den

When I first began dreaming about changing up our basement living space I knew one thing for sure: there had to be books. Books, and room for more books!

I began online shopping for bookcases six months ago and became more and more discouraged with each search. Something was always off — the price, the dimensions, the color, the negative reviews... all of a sudden it was the end of January and I still hadn’t landed on “the one.”

That is, until an image of open shelving magically appeared on my Pinterest page that made the six months of searching worth it. I loved the look of shelves of different heights and widths, which would allow me to display decorative items that don’t fit on standard bookcases. I spent hours poring over the original post before landing on my own design:


My dad picked up the supplies and stained the wood yesterday. I could hardly sleep knowing today was THE DAY THE SHELVES WOULD GO UP! I spent the morning clearing out the leaning bookcase in our living room so I can switch things around. 


Andy had zero interest in the shelves until today, when he joined my dad in hours of measuring, drilling and sawing. He suddenly got the fever, though, and wouldn’t let me come in the room until they were done! I loved seeing the twinkle in his eye as he shooed me away. It felt like Christmas!


!!!!!!! :) :) :) :) :) :)

Then my dad reminded me the boards need to be coated with polyurethane, and it really felt like Christmas... you know, when you’re handed the new toy you’ve been begging for and it takes hours to get through all of the thick plastic without losing a finger and then it requires triple A batteries but all you have are double A...

But they are mostly done, and I am over the moon. I’d like to give a round of applause to my guy, for spending the weekend shoveling snow, vacuuming the house, putting up my dream shelves and looking cute to boot, and to my parents, for being incredibly generous with their time and for accepting Peruvian chicken in exchange for their hard labor. 

Saturday, January 24, 2015

den: new paint

My parents came up last Saturday to help us paint the den. I agonized over paint colors for months and finally landed on “au lait ole” by Valspar. The color already on the walls was fine, but the room needed a paint job and I wanted a darker color. I’m already enjoying this room more, and I haven’t even decorated yet!

here is a before and after shot of the same wall:


….

I know. It hardly looks like we did anything! But look at how different the two colors actually are:

(notice the soot marks in the corner? yikes.)

You can see from the “before” shot and the “in-progress” shot that the original wall color looked different depending on the time of day I took the picture, and that’s the same with the new color. 

Complete after pics for this room won’t happen for at least a month because I have big plans to build a shelving unit. Wait, did I say I was going to build it? I meant my dad is going to build it. I’m going to try to help and not screw anything up. (He had to tell me to stop painting the trim because I was making a mess. Haha!)

Until then, I’ll show little peeks of what I have planned for the room. I couldn’t resist these two table lamps I found at Wal-Mart:


The gold lamp will definitely find it’s way into the den. It was $25 and I picked up a shade for it, too. The adjustable task lamp was only $18! Way to impress me, Wal-Mart.

And here are those two pieces of art I picked up in Georgia last November:


I know not everyone will share in my excitement over these ship prints. I DON’T CARE. I spotted them at Canton Street Antique Market in Roswell, and I knew right away that I had to have them. The price was right and the custom frames are in good condition. (They just need a little dusting.) The top ship was German and the bottom one was British. 

Are they not perfect for a den? I mean, really. I’ll just try to ignore the sounds of Andy’s video games while I write letters and study atlases. ;) 

Chaise fans: I have reached a decision. Well, Andy reached a decision and I regretfully agree. It’s outta here. It just doesn’t work with my vision for the room. I’d keep it for another space, but one of the wooden legs is split and sitting in it was a bit of a risk. Farewell, chaise! You were loved by my family and a few readers of this blog. 

Stay tuned!

Friday, January 16, 2015

den: before

I’m going into this project knowing I’m never going to get the “after” that I really want, because we have more important things to pay for than new flooring, custom built-ins and all new furniture. (If only, right?)  I love seeing room makeovers, but I’m often discouraged when I see that the owner’s budget was thousands of dollars. I have a dream of one day being paid to provide decorating consulting and styling for people on a more realistic budget, so what better way to practice than on my own home?

The room is in our basement, and has been serving as Andy’s “office.” Let’s call it what it really is: a place to put spare furniture. It was a functional space, but it wasn’t pretty. Andy would invite me to read on the couch while he played video games on his computer and I’d spend the whole time frowning at the room, trying to think of how to improve it.

I want the room to be a comfortable place to hang out, especially since it’s nice to have a second living area when entertaining guests. However, it’s not going to be our *main* living space, since we already have a lovely living room on the main floor that has our beloved leather furniture. (And our television.) So we’re going to make do with what we have and spend bits of money here and there to finish out the room. A few months ago I came across two pieces of framed art that I instantly fell in love with. I found them while visiting a friend in Georgia and had to have them shipped here, but the price was right and that purchase helped me hone in on my vision: I want this room to be a quintessential den. A cozy, secluded place for working and reading and playing games. A room with thoughtfully placed decor—a mix of masculine touches and pretty things.

Here’s what it looks like right now (halfway through getting stuff moved out so we can paint):


We used to have our black bookcase/cabinet along this wall, but we sold it on Craigslist a few months ago.  I wasn’t feeling it anymore. I’m not sure yet what will go here, but it will be some form of shelving.

We’re keeping the couch and the desk and computer chair. I’m on the fence about keeping the chaise and the glass-doored bookcase. Our first order of business is to paint the walls a slightly darker color. We’re sticking with a neutral since we’re working with a navy couch and potentially keeping that crazy fabulous chaise.

I can’t wait to finally get going on this room! Stay tuned for progress pics!

Monday, September 24, 2012

state art from etsy

When we found out we weren't moving last winter I promptly purchased a piece of Virginia state art from Etsy as a sort of present to myself for being put through the agony of uncertainty. Jokes on me, 'cuz we moved to Maryland! As soon as we moved in I ordered another print.

I finally got around to finding frames and hung the prints last weekend. I wonder if any other states or countries will join them in the future? I don't know what I'll do if we end up moving to another part of Virginia or Maryland... oh well, these work for now! I love seeing them on the wall.


The prints are from this shop.
The frames are from Michaels and were buy one get one free!

Wednesday, July 18, 2012

picking an end table

I sat down today determined to pick out an end table to replace the boxy black one next to our living room couch. There isn't anything wrong with our current table (in fact, we'll be selling it along with a matching glass-top coffee table- lemme know if you're interested), but it's too large for the space and doesn't "go" with the other pieces of furniture in our LR. I've been scouring Craigslist for months and haven't found anything remotely close to what I'm looking for, so I checked out worldmarket.com, overstock.com and westelm.com.

end tables
view details here

Let's discuss.
1. Super cute, but would probably need to be painted in order to not get lost against our beige couch and chair. Dimensions were right on.

2. This table would compliment the other antiques in the living room, but it is just as big as the current table we have (though clearly it's round, not square). It was out of the running as soon as I read the dimensions.

3. I immediately liked the practicality of this table as well as the subtle weathered finish. I didn't like that it only had one review, and it's hard to tell how sturdy it is from the picture.

4. I loved the quirky-ness of this table and clicked on it as soon as I saw it's $35 price tag, but one of the reviewers pointed out that you get what you pay for. The more I looked at it the less I loved it for the space.

5. This table would look so modern and would stand out against the other heavier pieces in the room, but it's actually too small! I just bought a large table lamp and I think it would overwhelm this dainty table.

6. Oh that color! If the seafoam is as dark in real life as it is in the pics, it would look amaaazing with our rug that's a similar shade. Alas, this table is way too different than all of the other pieces of furniture in the room, plus it's boxy and I didn't want a square table.

Sooo which did I pick?


Shuffle End Table


I actually had numero uno on hold at World Market but called them back and said "never mind!" about 20 minutes later. I prefer the dimensions of the Overstock table and I'm excited that I'll have more "counter space" for books and knick-knacks. Here's hoping it looks great in the room!

Sunday, July 15, 2012

weekending v.16

This weekend felt a bit fall-like to me, despite the weather being in the 90's. I wore jeans, painted my nails a smokey purple, made chili for dinner and was only a click away from buying a sweater online. Blasted shipping costs!

We had our Craigslist friends over for dinner last night and I'm happy to report that the evening was full of laughter and girl-dominated games. :) Bethany brought these lemon-lime basil shortbread cookies and I could not stop eating them! (She bakes them at 350 for ten minutes.)

Tonight we're heading to Germantown for a "Secret Shopper" gig. We have to fill out an extensive survey rating the restaurant and in exchange we get a free meal. 

I've been slowly putting together one of our upstairs guest rooms. My parents kindly hauled my childhood bedroom set up a few weekends ago. The twin bed, one of the nightstands and the desk are in the guest room, and the future baby room gets the dresser and second nightstand. That's right - the former "unpacked boxes rooms" are now the "upstairs guest room" and "misc furniture/Craigslist items/future baby room." That's what I call progress!

My favorite purchase for the guest room was a random Ross find. Sometimes you see an item and you just *know* it was meant to be. Meet my cheerful desk chair:


I knew the chair was a great find, but imagine my delight when I randomly came across the exact style here ($123 from Pottery Barn outlet) and here ($145 from Industry West). I got my red beauty for $25!

I also grabbed this colorful pillow to top the yellow quilt and navy striped bedding I got on sale from Target. 


I also added a basket and a little bowl to the room that I picked up at World Market last weekend. The basket was on sale for $12.99!


And last but certainly not least is a lamp I stumbled upon at TJ Maxx. Our living room only has one tiiiny overhead light and I've been looking for the right table lamp for beside the couch. The search is over! I'm pretty sure I gasped when I saw it. He fits right in.


Next weekend I'll be in Harrisonburg!!!